Showing posts with label gift tag. Show all posts

Wednesday, April 1, 2020

Sending Hugs Tag

Hello Everyone! Today I am so excited to share with you a Sending Hugs Tag that I created for inspiration this week featuring some Amazing Stamps, Dies, and Stencils from Stamp Anniething.
For my tag I am showcasing the Beautiful Norma Jean- You're Iconic Clear Stamp Set,  and Coordinating Dies. I just Love how versatile the stamps, and dies from Stamp Anniething are, and how they can be used for so many different occasions and projects. Now here is what I created:

Products used from Stamp Anniething:
Copic Markers used:
Skin: E04, E11, E21, E00, E000, E0000
Hair: E35, E31, E51, Y00
Blue: B07, B12 B00
Silver and White: C5, C3, C1
Pink: RV21, RV10, RV000

Distress and Distress Oxide Ink Pads used:
Background and Diecuts: Salty Ocean, Vintage Photo

Also don't forget to join in all the Stamp Anniething Stampers fun by adding your creations to the 

Thank you so much for stopping by! I hope that my project has inspired you to try out your own creations with these super Adorable stamps.

Hugs, Mindy

Monday, September 9, 2019

Theme Week #45

Hi everyone! It's MEG here to kick-off Theme Week #45 - let's get cozy!

For those of you who have participated, you know entering your design into this Theme Week Challenge is easy-peasy! I explain how to do that below. But first, my inspiration...

Have you noticed just how many Stamp Anniething characters there are?! And I bet some of them make you think of people you know. So, I bring you a new idea in creating holiday gift tags.


Here, I've used Lorraine - Hello and altered her hair (did you know you can do that?!) so she looks like me. You don't even need to add words explaining who your package is to when you've drawn them right into the tag!

Tags are super simple to create with the help of the Shaker Basics dies. I hope this inspires you to try a new approach to your holiday gift tags!

Ok, now back to the challenge:
  • Create your project to match the theme
  • Share your creation in our FB group by October 4 (please join if not already a member). Make sure you look for the Theme Week Challenge picture folder and upload your design pic there!
Have fun and see you next time!

Monday, June 17, 2019

Enjoy the Ride!

Hi everyone! It's Meg here today with a simple summer gift tag to share. I'm the kind of crafter who loves to add lots of detail in my creations, so having a smaller space to work on (a tag) is a great break sometimes.


For this project, I've used several supplies from the shop. Julie - Enjoy the Ride takes center stage with her green bicycle.

I die-cut the tag from the Shaker Basics Set 2 dies, and the clouds from the Abstract Splatter Bands. Those bands are really good dies to have, you can do so much with them! I created the grounding with the Under The Sea dies, another fave set of mine. The sun is the brand new Starburst Shaker Topper die.

The charm is used can be found here, and the white twine is from one of our Grab and Go! boxes.

Hope this design inspires you, and see y'all next time!

Wednesday, December 20, 2017

Masking Tip

Hello there, it's Ellen here and this time I have a quick tip for you. In this post I want to show you how easy and fun it is to give a face to any shape you can think of. I used the  “Katy Im Smitten Kitten” stamp set. Below you see how this is made:


1. First you need to stamp the image on some masking tape. For people that don’t know; masking tape is paper with a sticky side. The glue is not permanent, so you can remove the paper easily. That’s also why crafters use it a lot for fun techniques.

2. Everything you want to be visible on your actual project you have to cut out the masking paper. On my wooden tag I wanted a face, so I cut out the face on the masking paper. After that I simply placed the masking paper on top of my wooden pine tree and stamped my stamp on top of it. I used a stamping tool for it so I was sure my face would be exactly stamped in the open ‘window’ I created on the masking paper.


If you stamp on wood like I did, it’s good to first do a check up to be sure the ink doesn’t bleed into the nerves of the wood.


I cannot wait to do this same thing on a heart or a star. What are your ideas with the masking technique?

Monday, March 4, 2013

Bunny Tags for your Easter Goodies

Hi everyone, Annie here!  This is our first official posting for Stamp Anniething, showcasing projects made with the products.  I hope you enjoy the creations you see, check in on Mondays, Tuesdays, Wednesdays and Thursday's to see what all the Design Team members created!

Today I made a few cute Tags that can be used for your Easter Gift Baskets or package tie ons.  I just love how they came out, don't you?  Very simple project using For Peeps Sake, A Tag Die and some Tulle.
Here is a close up of the tags alone.  I made one vertical and one horizontal.
All you need to do is add them onto your bags and treats!

So here they are tied on with some green tulle to those Reeces Pieces Carrot bags you see all over town.
Want to know what I used to make these cute guys?

Materials List:
Stamp Anniething For Peeps Sake Stamp set
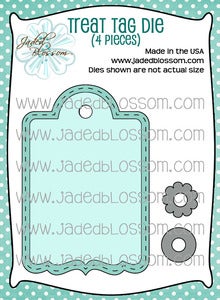
Jaded Blossom Tag Die
Small scrap of Green Tulle
Reece Pieces Carrot Cone Candy
and Copics of course (and I only used 7 colors!)