Tuesday, January 5, 2021

What A Deer

  Hi everyone! This is GiGi from The Cricut Bug and I'm sharing how to create a decorative mat using the Shaker Basics Dies.


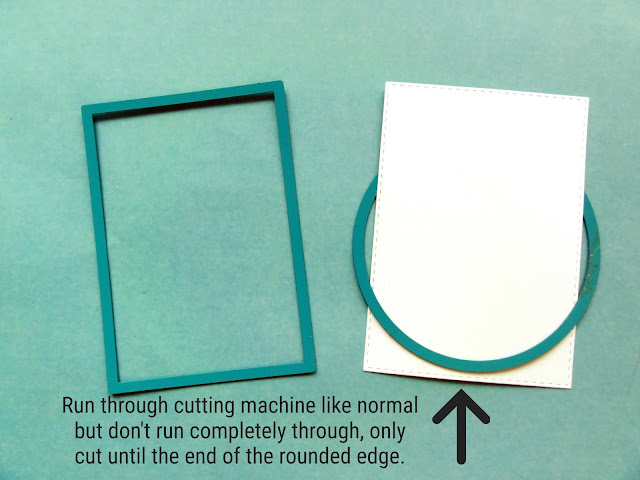
Start by cutting out the rectangle from the Shaker Basics 1.
Then you're going to layer the circle over one edge as pictured.


After the mat was finished, I threaded some twine through the top holes and stamped the sentiment.


I stamped and colored Lucille-What A Deer and added her on pop dots.
I also embossed the background of the card using the Diamond Lattice Stencil. You can see a tutorial on how I did that HERE


I hope you all liked  my project for today and thanks for visiting!
Have a great day! 

Tuesday, December 29, 2020

Happy Holidays

  Hi everyone! This is GiGi from The Cricut Bug and I'm sharing this fun holiday card using the Lorraine-Ugly Sweater stamp set.


I started this card with a standard A2 card base and added the rectangle mat cut from the Shaker Basics 1 die set.

I added the red scallop edge cut with the Edger Dies and the banner at the top from the Banner Dies.

I stamped and colored Lorraine with Copic Markers and added her on pop dots.

To finish, I stamped the holly and sentiment from the Stacey-Sign Board stamp set and added the holly to the banner.

I hope you all liked my card for today and thanks for visiting!

Have a great day! 

GiGi


Tuesday, December 15, 2020

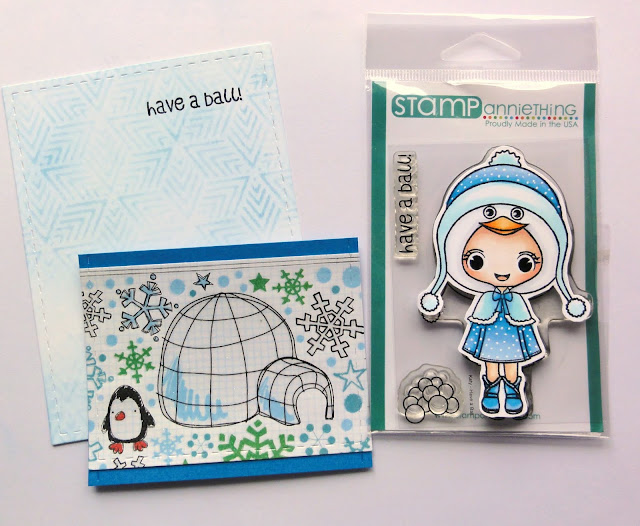
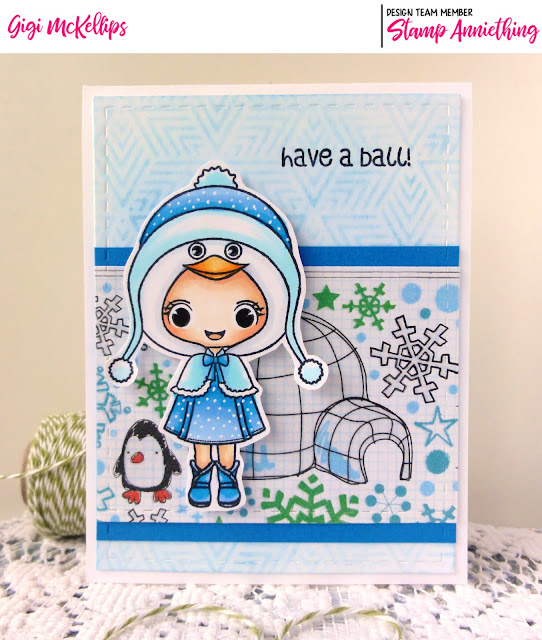
Have A Ball

   Hi everyone! This is GiGi from The Cricut Bug and I'm sharing a stenciled chalk background tutorial. I've gotten so used to using ink blending for my backgrounds, I forget how easy and beautiful this technique is.


I started this project using the Geo Triangles stencil and Versa Mark embossing ink with a dauber.
 NOTE* in picture below, I used a sheet of blue paper so you could see it better but I used white for the actual card.


I started by placing the stencil over my card base and using the dauber and Versa Mark Ink, I daubed in the design.


After the inked design in filled in, I removed the stencil and started adding my chalk.
I used a cotton sponge, adding some blue chalk, and rubbing lightly over the design.
For a more vibrant look, you can add several layers of chalk over the ink.


 After my card background was complete, I added a strip of matted decorative paper to the background and stamped the sentiment at the top.
I stamped and colored the Katy-Have A Ball stamp with Copic Markers and added it to the card  on pop dots.


I hope you all liked my project for today and thanks for visiting!
Have a great day!

Tuesday, December 1, 2020

What's This?

Hi everyone! This is GiGi from The Cricut Bug and I'm sharing this fun Christmas card using the Scary Town Kit.


I started this card with a standard A2 card base and added the circle mat cut from the Shaker Basics 1 die set.

I cut the swirl bottom in white and added Stickles to make it look like snow.

I stamped and colored Jack, using a white gel pen to add in his stripes.

To finish, I added a ribbon to the side, stamped the sentiment, and added Jack on pop dots.

I hope you all liked my card for today and thanks for visiting!

Have a great day!

GiGi 

Tuesday, November 17, 2020

Sweater Weather

  Hi everyone! This is GiGi from The Cricut Bug and I'm sharing this card using the Diana-Sweater Weather stamp set.


I started this card with a standard A2 card base and added the circle mat cut from the Shaker Basics 1 die set.
I added some ribbon around the middle and stamped the sentiment.
I stamped and colored Diana with Copic Makers and added her to the card on pop dots.
To finish, I added a hand cut leaf and some enamel dots to the mat.

I hope you all liked my card for today and thanks for visiting!
Have a great day!

GiGi

Tuesday, November 10, 2020

Technique Tuesday

   Hello my crafty friends!

It's Candace from Candi O. Designs to share with you a Technique this Tuesday!!!  I'm going to show how you can use your stencils to emboss paper.  The background paper is embossed using Falling Leaves Stencil.

 
I cut down a piece of cardstock paper and put it through my Gemini die cut machine.  
I sandwiched it:
-clear cutting plate
-rubber embossing mat
-cardstock paper
-stencil
-plastic shim
-clear cutting plate 

To add to the embossed cardstock, I inked with vintage photo distress oxide.

Next I used the rectangle die from Shaker Basics #1 and cut pattern paper from Autumn Life pack.

I also cut out the Give Thanks Die with the leaves and stamped, outlined Krissy.

 Stamp Anniething Products used:

Hope you enjoyed this technique and have a great day!

Tuesday, November 3, 2020

Treat Holder Tutorial

 Hi everyone! This is GiGi from The Cricut Bug and I'm sharing this treat holder tutorial.


I started this project using the tag shaped die from the Shaker Basics 2.

I lined up the die on one edge of the paper and ran it through the cutting  machine just to the end, not going all the way.

Then I took the die off, flipper the paper, and lined the die up again on the side of the paper, cutting to the end but not all the way through.


After I got both sides cut, I trimmed the centers where it was still connected with a pair of scissors.
Using my score board, I scored in each side at 3 7/8 and added the mat layer from the Shaker Basics 2 die set.


I cut the banner pieces using the Banner Dies and cut out the center swirl from the Candy Cane Frame Die.
I punched a 3/4 inch circle and 1 inch circle and glued all the pieces together, adding Stickles over the entire thing.


I stamped the sentiment onto the banner using the Stacey-Sign Board stamp set and used a hole punch to punch the hole for the ribbon closure.
I stamped and colored the Sweet Christmas Wishes Digital Stamp and added Stickles to her dress and bow.
I added the bag of M&M's to the inside and tied it closed with some ribbon, adding the candy onto the ribbon with pop dots.
To finish, I added the banner die and pop dotted the girl to the front.


I hope you all liked my project for today and thanks for visiting!
Have a great day!